Intro
Running PHP, Nginx container using Docker on AWS Beanstalk is really easy when you get the hang of it after spending some time on Dockerhub and reading tutorials (like this) will allow you to get up and running with your own project as quick as possible.
If you you would like another resource I highly recommend reading Docker file best practices
Prepare the source.zip
This is the source.zip file we will be uploading as our code to the beanstalk, you can use the list of files with associated content below to build your image
FROM alpine:3.14
# Install packages
RUN apk update
RUN apk --no-cache add \
ca-certificates \
php \
php-fpm \
php-opcache \
php-openssl \
php-curl \
php-mysqli \
php-pdo \
php-pdo_pgsql \
php-pdo_mysql \
php-pgsql \
php-json \
php-session \
php-tokenizer \
php-bcmath \
php-mbstring \
php-ctype \
php-xml \
nginx \
supervisor \
curl \
bash
# Configure nginx
COPY docker-config/nginx/nginx.conf /etc/nginx/nginx.conf
# Configure supervisord
COPY docker-config/supervisord/supervisord.conf /etc/supervisor/conf.d/supervisord.conf
# Setup document root
RUN mkdir -p /var/www/html
# Make sure files/folders needed by the processes are accessable when they run under the nobody user
RUN chown -R nobody.nobody /var/www/html && \
chown -R nobody.nobody /run && \
chown -R nobody.nobody /var/lib/nginx && \
chown -R nobody.nobody /var/log/nginx
# Switch to use a non-root user from here on
USER nobody
# Add application
WORKDIR /var/www/html
COPY src/ /var/www/html/
# Expose the port nginx is reachable on
EXPOSE 8080
# Let supervisord start nginx & php-fpm
CMD ["/usr/bin/supervisord", "-c", "/etc/supervisor/conf.d/supervisord.conf"]
# Configure a healthcheck to validate that everything is up&running
HEALTHCHECK CMD curl --silent --fail http://127.0.0.1:8080/fpm-ping
[global]
error_log = /dev/stderr

[www]
listen = /run/php-fpm.sock
pm.status_path = /fpm-status
pm = static
pm.max_children = 100
pm.process_idle_timeout = 10s;
pm.max_requests = 1000
clear_env = no
catch_workers_output = yes
decorate_workers_output = no
ping.path = /fpm-ping
expose_php = Off
[Date]
date.timezone="UTC"
worker_processes auto;
error_log stderr warn;
pid /run/nginx.pid;

events {
    worker_connections 1024;
}

http {
    include mime.types;
    default_type application/octet-stream;

    # Define custom log format to include reponse times
    log_format main_timed '$remote_addr - $remote_user [$time_local] "$request" '
                          '$status $body_bytes_sent "$http_referer" '
                          '"$http_user_agent" "$http_x_forwarded_for" '
                          '$request_time $upstream_response_time $pipe $upstream_cache_status';

    access_log /dev/stdout main_timed;
    error_log /dev/stderr notice;

    keepalive_timeout 65;

    server_tokens off;

    # Write temporary files to /tmp so they can be created as a non-privileged user
    client_body_temp_path /tmp/client_temp;
    proxy_temp_path /tmp/proxy_temp_path;
    fastcgi_temp_path /tmp/fastcgi_temp;
    uwsgi_temp_path /tmp/uwsgi_temp;
    scgi_temp_path /tmp/scgi_temp;

    # Default server definition
    server {
        listen 8080 default_server;

        server_name _;

        sendfile off;

        root /var/www/html;
        index index.php index.html;

        location / {
            # First attempt to serve request as file, then
            # as directory, then fall back to index.php
            try_files $uri $uri/ /index.php?$query_string;
        }

        # Redirect server error pages to the static page /50x.html
        error_page 500 502 503 504 /50x.html;
        location = /50x.html {
            root /var/lib/nginx/html;
        }

        # Pass the PHP scripts to PHP-FPM listening on 127.0.0.1:9000
        location ~ \.php$ {
            try_files $uri =404;
            fastcgi_split_path_info ^(.+\.php)(/.+)$;
            fastcgi_pass unix:/run/php-fpm.sock;
            fastcgi_param SCRIPT_FILENAME $document_root$fastcgi_script_name;
            fastcgi_param SCRIPT_NAME $fastcgi_script_name;
            fastcgi_index index.php;
            include fastcgi_params;
        }

        location ~* \.(jpg|jpeg|gif|png|css|js|ico|xml)$ {
            expires 5d;
        }

        # Deny access to . files, for security
        location ~ /\. {
            log_not_found off;
            deny all;
        }

        # Allow fpm ping and status from localhost
        location ~ ^/(fpm-status|fpm-ping)$ {
            access_log off;
            allow 127.0.0.1;
            deny all;
            fastcgi_param SCRIPT_FILENAME $document_root$fastcgi_script_name;
            include fastcgi_params;
            fastcgi_pass unix:/run/php-fpm.sock;
        }
    }

    gzip on;
    gzip_proxied any;
    gzip_types text/plain application/xml text/css text/js text/xml application/x-javascript text/javascript application/json application/xml+rss;
    gzip_vary on;
    gzip_disable "msie6";

    # Include other server configs
    include /etc/nginx/conf.d/*.conf;
}
[supervisord]
nodaemon=true
logfile=/dev/null
logfile_maxbytes=0
pidfile=/run/supervisord.pid

[program:php-fpm]
command=php-fpm7 -F
stdout_logfile=/dev/stdout
stdout_logfile_maxbytes=0
stderr_logfile=/dev/stderr
stderr_logfile_maxbytes=0
autorestart=false
startretries=0

[program:nginx]
command=nginx -g 'daemon off;'
stdout_logfile=/dev/stdout
stdout_logfile_maxbytes=0
stderr_logfile=/dev/stderr
stderr_logfile_maxbytes=0
autorestart=false
startretries=0
# Webserver

running alpine linux with php and nginx

## Building and running
docker build -t mhodge/webserver .
docker run --name=mhodge-webserver -p 80:8080 mhodge/webserver

## Stop the container
docker container stop mhodge-webserver

## Remove the container
docker container rm mhodge-webserver

## Remove the image
docker image rm mhodge/webserver
{
    "AWSEBDockerrunVersion": "1",
    "Logging": "/tmp/php-nginx-webserver",
    "Image": {
        "Update": "false"
    },
    "Ports": [
        {
          "HostPort": 80,
          "ContainerPort": 8080
        }
    ]
}
Your final path should look something like this:
Source
-docker-config
--nginx
---nginx.conf
--php
---fpm-pool.conf
---php.ini
--supervisord
---supervisord.conf
-src
--index.php
--static.html
-Dockerfile
-Dockerrun.aws.json
-README.md
Running Locally
You can now do a local test with the given folder performing the commands as per the README.md
Build and Run
- docker build -t mhodge/webserver .
- docker run --name=mhodge-webserver -p 80:8080 mhodge/webserver
Stop and Remove
- docker container stop mhodge-webserver
- docker container rm mhodge-webserver
- docker image rm mhodge/webserver
AWS
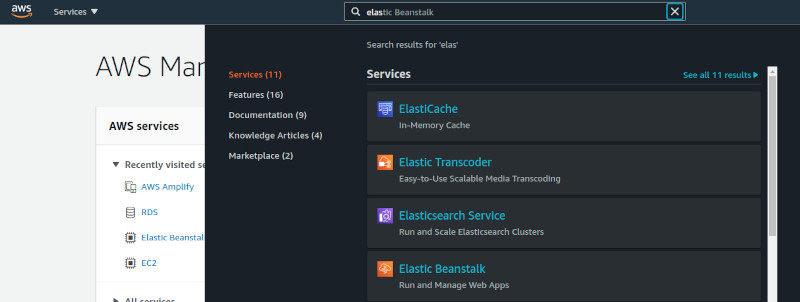
I'm assuming you have an AWS account setup and are ready to get started, after logging in search and open elastic beanstalk
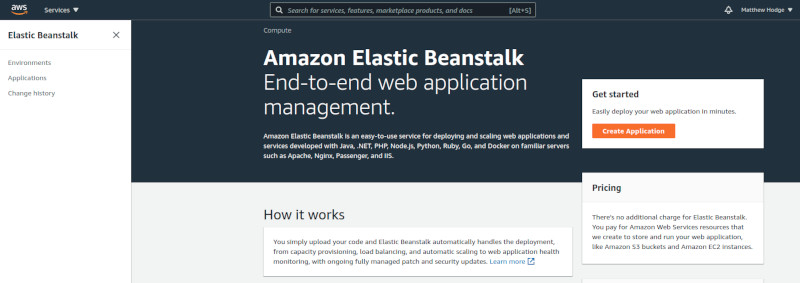
The Beanstalk console will load as per below, when it does click create application
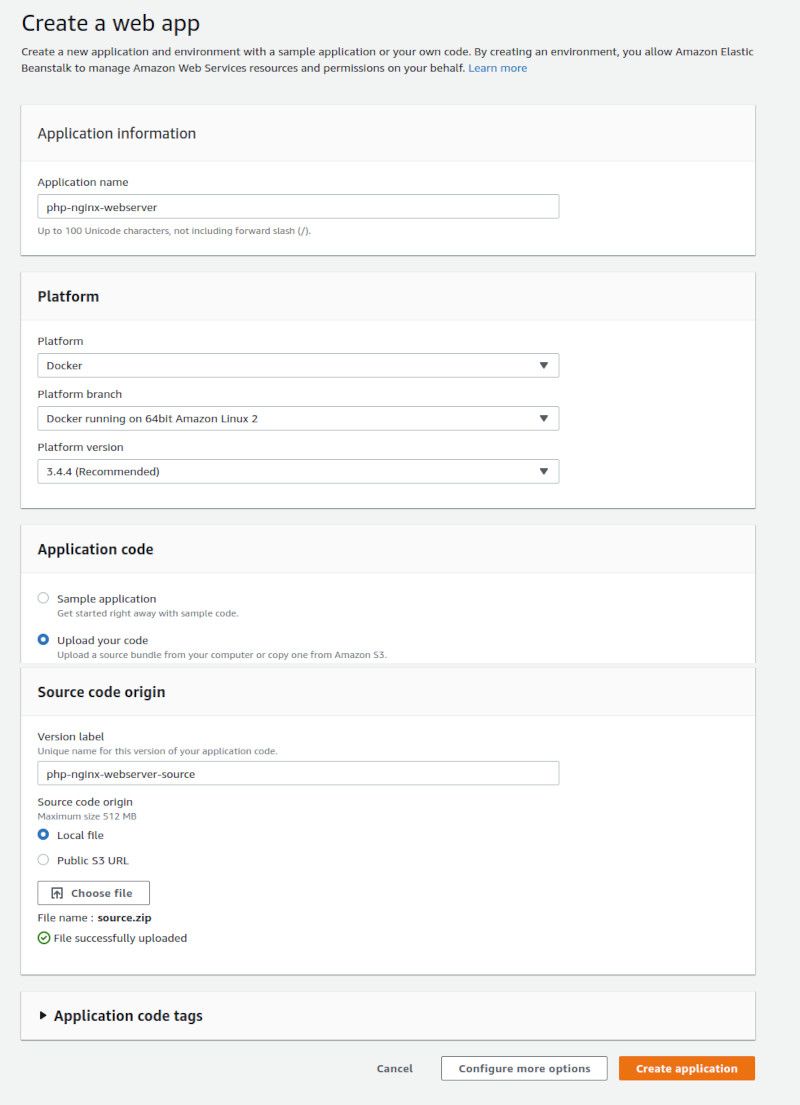
Fill in the fields as per below, however we going to make some slight adjustments to the configuration after populating all the fields click the Create application button, go grab a coffee and let AWS Beanstalk set things up
AWS Beanstalk will now configure all the cloudwatch, auto scalling groups, etc2 instances etc etc preparing to boot your configuration as per the source.zip we created earlier.
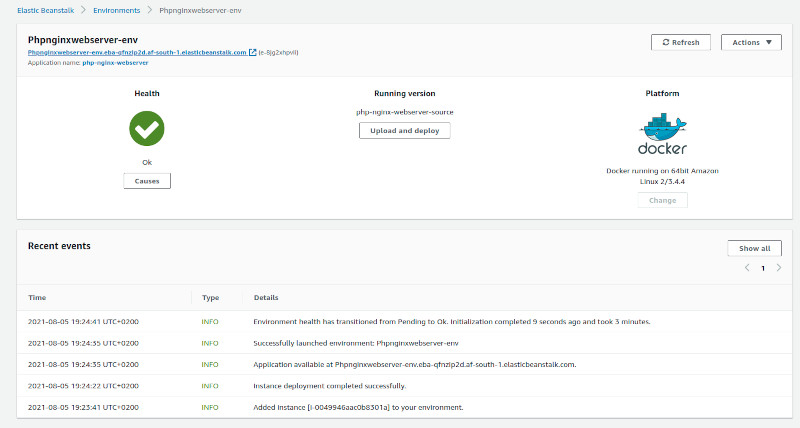
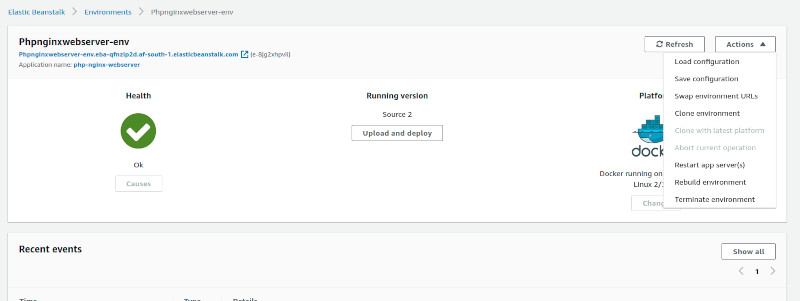
Just like that our instance is up and running, you can use the link created by beanstalk in the top left to access your newly created and running application you should see something like below (pending how you altered your source.zip)

Where to from here?
This should give you enough grounding to get playing with Docker on your local / cloud, this barely scratches the surface, why not try multi phase build? include a database? use an EFS? options are wide open!
Then there is of course codepiplines codebuilds so much more to play with.
Highly suggest you read Use multi-stage builds over on docker.
If you think this is cool wait until you see GitHub Actions, but thats a tutorial for another day
Conclusion
Once all said and done, dont forget to stop those running containers, and make sure to terminate your beanstalk (if you were just playing around).
Just load up your beanstalk console click actions, Terminate Environment.