Matthew Hodge
Full Stack Developer

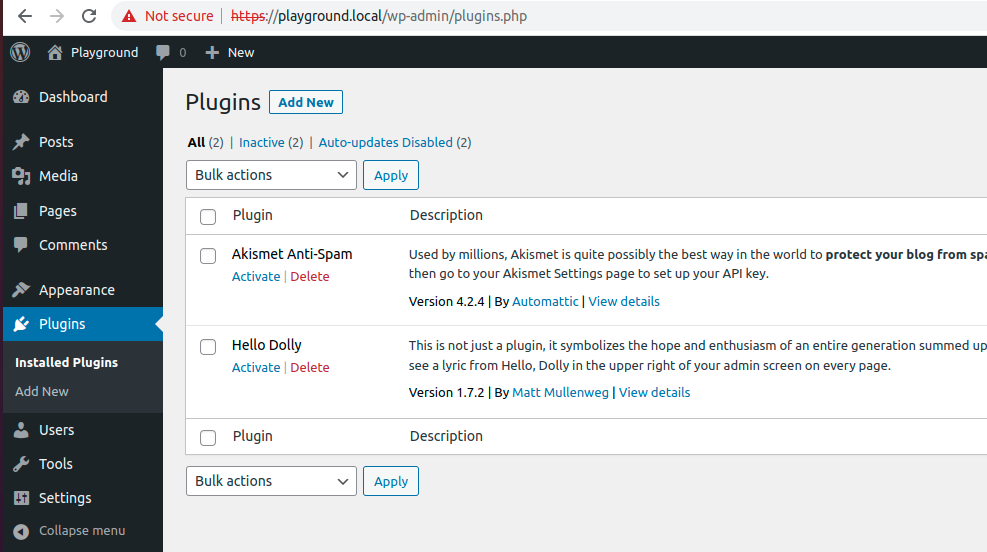
Creating multiple Gutenberg blocks doesn't mean you need multiple plugins. Let's explore how to create a single plugin that can house multiple blocks efficiently.

Initial Setup

First, create your plugin's base structure using the @wordpress/create-block tool, we will be creating a plugin called "demo" for the sake of this tutorial, if you use a different name update references accordingly.

cd wp-content/plugins
npx @wordpress/create-block@latest demo

This creates your plugin's basic structure with one block. Now, let's add more blocks to it.

Adding Additional Blocks

Navigate to your plugin's source directory:

cd demo/src

Create additional blocks using the --no-plugin flag to avoid generating unnecessary plugin files, I have just called my two additional blocks "foo" and "bar" respectively, if you use different names update references accordingly

npx @wordpress/create-block@latest foo --no-plugin
npx @wordpress/create-block@latest bar --no-plugin

Plugin Structure

Your directory structure should now look like something like this:

demo/
├── src/
│   ├── demo/
│   ├── foo/
│   ├── bar/
└── demo.php

Update the demo.php file to enable loading the additional blocks

The generated demo.php file will look something like this

<?php
/**
 * Plugin Name:       Demo
 * Description:       Example block scaffolded with Create Block tool.
 * Version:           0.1.0
 * Requires at least: 6.7
 * Requires PHP:      7.4
 * Author:            The WordPress Contributors
 * License:           GPL-2.0-or-later
 * License URI:       https://www.gnu.org/licenses/gpl-2.0.html
 * Text Domain:       demo
 *
 * @package CreateBlock
 */

if ( ! defined( 'ABSPATH' ) ) {
    exit; // Exit if accessed directly.
}

/**
 * Registers the block using the metadata loaded from the `block.json` file.
 * Behind the scenes, it registers also all assets so they can be enqueued
 * through the block editor in the corresponding context.
 *
 * @see https://developer.wordpress.org/reference/functions/register_block_type/
 */
function create_block_demo_block_init() {
    register_block_type( __DIR__ . '/build/demo' );
}
add_action( 'init', 'create_block_demo_block_init' );

Lets update the create_block_demo_block_init to allow it to use ALL our blocks

Replace

function create_block_demo_block_init() {
    register_block_type( __DIR__ . '/build/demo' );
}
add_action( 'init', 'create_block_demo_block_init' );

With this

function create_block_demo_blocks_init() {
    $blocks = array_map( function( $block ) {
        return [
            'name' => $block,
        ];
    }, array_filter( scandir( __DIR__ . '/build' ), function( $block ) {
        return $block[0] !== '.' && is_dir( __DIR__ . '/build/' . $block );
    } ) );

    foreach ( $blocks as $block ) {
        register_block_type( __DIR__  . '/build/' . $block['name'] );
    }
}
add_action( 'init', 'create_block_demo_blocks_init' );

Building Your Blocks

To build all blocks for production:

npm run build

For development with live reload:

npm run start

Block Usage

You can now navigate to the post and or page you would like to include your relevant block after altering the functionality as you desire

Using the blocks

When navigating to the front end you can now see the blocks which will display the content accordingly

Front end view of the blocks

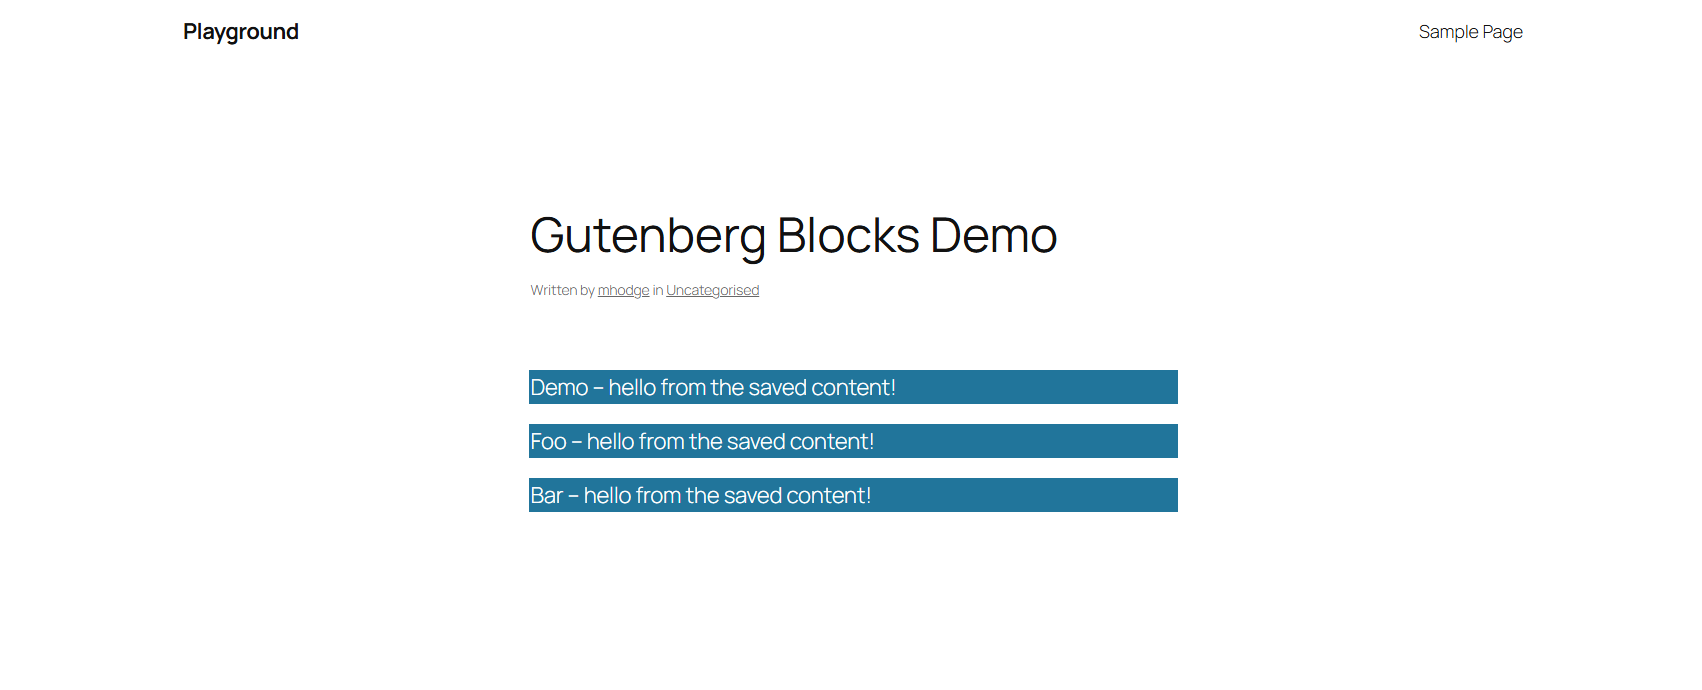
This approach allows you to maintain multiple Gutenberg blocks within a single plugin, making maintenance and updates more manageable. Each block remains independent but shares the same build process and plugin infrastructure.

For more information, check out the @wordpress/create-block.


WordPress along with its plugins directory has a folder called mu-plugins which when created inside the wp-content directory, will "force" WordPress to load the "must use" plugins from this directory.

A typical fresh install of WordPress has the following inside the plugins: default - plugins

Lets say just for arguments sake that you would like to set the error reporting level in PHP to display all errors BUT not deprecation warnings.

You can then create the following file in the mu-plugins directory as per below

/wp-content/mu-plugins/error-reporting.php
<?php 
/*
    Plugin Name: PHP - Don't report deprecation warnings
    Description: Don't report deprecation warnings
*/
error_reporting(E_ALL & ~E_DEPRECATED);

Now when you refresh your plugins page you will notice the new link "Must-Use" which will show the plugins WordPress has been told to load.

must use plugin added

If you open the Must-Use link you will see the plugins listed which are being force loaded i.e you cannot activate, deactivate or remove (as the name implied, Must Use!)

must use plugin list

Now you will not have your log files building up with deprecation notices!


When working with WordPress themes its always a good idea to create a child theme of the parent theme you are using, doing this is a relatively painless exercise. Create a folder matching the parent theme's name appended with the '-child' i.e. if twentytwentyone is the parent then create twentytwentyone-child.

Two files required for a basic child theme are style.css and functions.php

style.css
/*
 Theme Name:   Twenty Twenty One Child
 Theme URI:    http://example.com/twenty-twenty-one-child/
 Description:  Twenty Twenty One Child Theme
 Author:       Matthew Hodge
 Author URI:   http://example.com
 Template:     twentytwentyone
 Version:      1.0.0
 License:      GNU General Public License v2 or later
 License URI:  http://www.gnu.org/licenses/gpl-2.0.html
 Tags:         light, dark, two-columns, right-sidebar, responsive-layout, accessibility-ready
 Text Domain:  twentytwentyonechild
*/
functions.php
add_action( 'wp_enqueue_scripts', 'my_enqueue_function' );
function my_enqueue_function() {
    $parent_handle = 'twenty-twenty-one-style'; 
    $theme = wp_get_theme();
    wp_enqueue_style( $parent_handle, get_template_directory_uri() . '/style.css',  [],  $theme->parent()->get('Version') );
    wp_enqueue_style( 'twenty-twenty-one-child-style', get_stylesheet_uri(), [ $parent_handle ], $theme->get('Version') );
}

Do take note that when enqueueing you need to update the above code sample parent_handle to match that of the parent theme and to reference the correct style (failure to do so may result in the theme being included twice pending how the parent theme was written), as the style.css itself might be named something different for example main.css.

Last tip when dealing with enqueuing files is that the version will get cached by the browser, in order to ensure your changes are taking effect you would have to update the Version declaration inside your style.css (production) or alternatively you could use the time() / filemtime()

wp_enqueue_style( 'twenty-twenty-one-child-style', get_stylesheet_uri(), [ $parent_handle ], time() );
//OR
wp_enqueue_style( 'twenty-twenty-one-child-style', get_stylesheet_uri(), [ $parent_handle ], filemtime( get_stylesheet_directory() . '/style.css' ) );

If using the time() take care as this should never be pushed to production, what would be best is to have your webpack produce the style from your assets increasing the version for you during your build process (if you have this available).